
React Native has a wide range of functionalities in the sense that it can make your app more scalable. On this note, I will bring you a tutorial blog to explain how you can add different font styles to your app and use it whenever you want. If you don’t provide the option of using different fonts, your user can only use the default fonts based on the OS they are using. Android users will have Roboto as their default font option whereas iOS users will have San Francisco as their default font style. Let’s see how you can integrate different font styles using smarter react native app development services and get an interesting display on your app.
What are the needed prior learnings?
You have to get a fair idea about the ABC of React Native framework. These are the fundamentals without which you cannot start with this tutorial blog. Although we can use different React Native tools to build the app, here, I have used the React Native CLI. If you want to learn about different React Native tools and the difference between them, you can visit one of my articles (click here) where I have defined both Expo CLI and React Native CLI specifying their utility. This will help you to choose the appropriate tools as per your development needs.
The below-mentioned criteria are the most important learning that you need to acquire.
- Make your system compatible with the environment- Here, we are completely focused on Android users. It is vital to know that setting the React Native development environment is distinct for distinct OS users. If you are an Android user, follow along with me as I proceed. Whereas, if you are an iOS user, you can wait for the iOS-specific blog to come. Visit this article and go straight to the React Native CLI section to get further assistance.
- You cannot change the fonts unless you already have an app. Right? So, for this, you have to learn about creating a basic React native app using the framework. If you are stuck and looking for reliable guidance, check this article to get hands-on experience on how you can build a basic ‘Hello World’ app and run the same on the emulator.
Here, we won’t be using any third-party React Native package. However, a correct approach of downloading the font style package and adding the same in the app directory is required. Let’s see how you can achieve this.
Firstly we will start with an explanation of the code.
Interpreting the codelines stored in the App.js folder
Firstly import all the React Native components that you may need in the app-building process. Note that, you can add the basic component and add others as you proceed to write the codelines. For the current project, I have added the following components at the top line of my codebase.
import {StyleSheet, Text, View} from ‘react-native’;
import React from ‘react’;
You need StyleSheet components for adding styling parameters. View component is useful for the UI factor. Text component is required for adding different text elements to the app interface. Further, I imported React from the native ‘react’ package to integrate the JS XML syntax.
Next, you have to add a function App, where you will define all the functionalities and add different components needed to custom fonts.
Add the following line.
const App = () => {
In this open curly bracket, I have to add the text elements and container. Also, you have to add the styling object. This styling object will allow you to add styling parameters to design the container and the displayed text. Let’s see what is the code syntax for this.
return (
<View style={styles.container}>
<Text style={styles.text}>HELLO TANUSREE</Text>
</View>
);
Lastly, you have to use the line export default App; This is for exporting the function App that you have created in this project. React Native has a feature of importing functions and components where users can call components and functions from other files or libraries. This is one of the significant features due to which the React Native framework has grown to be one of the most preferred frameworks by developers.
Now, comes the styling part using StyleSheet.
const styles = StyleSheet.create({
container: {
flex: 1,
justifyContent: ‘center’,
alignItems: ‘center’,
},
text: {
fontSize: 50,
fontFamily: ‘Marhey-Regular’,
},
});
Here, as you can see, I have styled the container and the text. The parameters: flex, justifyContent, and alignItems are used for styling the container. Whereas, fontSize and fontFamily are used to style the text elements: “HELLO TANUSREE”.
Flex is set as 1. We use flex to define how the component will occupy or is shared in the given space. Flex as 1 defines that the object Container will occupy the available space in an even manner.
The most important part of this syntax is the fontFamily under text. Here, you have to make changes every time you want to display different fonts in your app. It is important to know that you cannot randomly input the name of the font style and see the changes. There are some steps that you need to undertake to complete the task.
Let’s discuss the process in detail now.
Downloading font libraries in the android/app/src/main/assets/fonts
Yes, you have to download the package ( font styles you want to use) from https://fonts.google.com/about. Go to this site and open the ‘Font’ option on the page. You need to type all the font styles you want to use one after another. Download all the folders one by one and get them into your local folders.
Extract all these files. Here, for this project, I have used three different font styles: RubikBubbles-Regular. Copy the .ttf files from each of these zipped folders. These are the font styles that you need to paste in the android/app/src/main/assets/fonts directory of your project. This is the way you can use different fonts in your project. Note that, you cannot use any random fonts but have to save all the fonts in this manner before its application. Also, don’t forget to save it after you make changes in the code editor, or else it won’t display in the emulator.
Now try and see the changes. Before that, let’s see how you can start the emulator.
Activating the emulator and testing the app
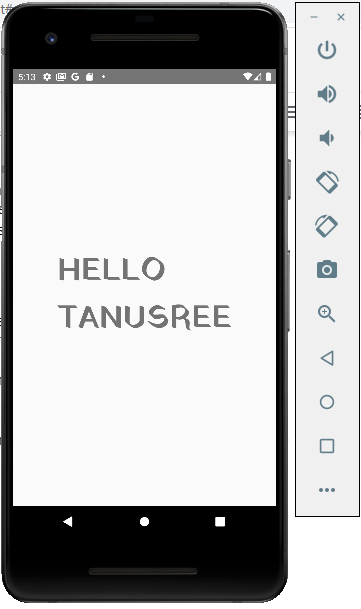
You need to run two commands simultaneously and it will start running. The first command is npm install. The second one is npx react-native run-android. As soon as your emulator starts, it will show the text element “HELLO TANUSREE” in the font style already saved. For my project, the output is as given in image 1. It is in Marhey-Regular font style.

If I change it to YatraOne-Regular, it will show me the output as image 2. After editing the code, save the process to get the correct display.
So, now successfully you are done with customizing fonts in your react native app. Hope you have liked the blog and understood the concept.